Wednesday, September 29, 2010

Jicama Mama

The jicama belongs to the legume or bean family (Fabaceae). Other names for jicama are the Mexican potato, Mexican yam bean, ahipa, saa got, Chinese turnip, lo bok, and the Chinese potato. 

I found this gorgeous jicama in the grocery store and had to bring it home and do something with it. I had never cooked with a jicama, so this would be a new experience.

Jicama has the consistency of a water chestnut and can be used like a water chestnut in cooking. Jicama can be eaten raw, but the skin should be peeled first. Raw jicama tastes slightly like an apple, only milder and works well with a raw vegetable platter. When jicama is used in cooking it tends to take on the flavors of the ingredients that it is being combined with. Therefore, it works well in stir-fry dishes because it blends well with many vegetables and seasonings. The picture on the right below shows a peeled jicama.


Jicama contains a large amount of vitamin C, is low in sodium, and has no fat. One adult serving of jicama, which is equal to approximately 1 cup of cubed jicama or 120 grams, also contains only 45 calories. Other nutritional information is given below.


Serving Size (60g)
Amounts Per Serving 

% Daily Value *
Calories 25
Calories from Fat 0
Total Fat 0g 0%
Sodium 0mg 0%
Cholesterol 0mg 0%
Total Carbohydrate 5g 2%
Dietary Fiber 3g 12%
Sugars 1g
Protein 0g
Vitamin A 0%
Vitamin C 20%
Calcium 0%
Iron 2% 

Saturday, September 25, 2010

Banana Blossom Frenzy


My brother lives near Raleigh, North Carolina...and although Raleigh is usually not banana territory, he managed to keep a banana plant alive in his backyard until it bore fruit. On the right is a picture of his masterpiece!

Below you can see a varmint that ventured into his banana plant.

(Okay...so it's stuffed...but it loves bananas too!)


My brother was telling me about cooking the banana flower from his plant, so I became interested. I was unaware that people actually ate the banana flowers.

So I visited an Asian Grocery here in Austin and bought two banana flowers. Being curious like I am, I ended up spending about two hours in the grocery (it is quite large). I came away with about 5 bags of food, including lotus root and bitter melon.

After I brought my banana flowers home, I had to find out how to cook them, so I went to you tube and

found a great video showing me how at http://il.youtube.com/watch?v=iuQuP5hlBPo.

I found another video at http://il.youtube.com/watch?v=btFSywCa8x8&feature=related that showed how to prepare the flower for cooking.

The outer red bracts are tough and need to be removed. Below you can see the tender parts of the flower after the bracts are removed. Below that picture, you can see what it looks like when cut in half.


If you look carefully below, you can see the layering. These are layers of bracts and flowers. In the center is a tough core that many people remove. Banana flowers are quite interesting, and in my next post I will discuss them.


First, I must warn you that the banana flower turns brown quickly after being cut, so it helps to squeeze some lime juice onto it to retain the light color.

I modified the you tube recipe a lot because we do not like hot and spicy food, and I wanted to use chicken instead of fish. Everyone loved the dish that I made so here I will explain how it is made.

You will need

  • 1-2 banana flowers
  • dried tamarind
  • water
  • about 1/2 cup coconut flakes
  • about 1 cup of coconut milk
  • 1 onion
  • 1 chili pepper (this can be adjusted to your taste...using only one makes it quite mild)
  • 2 limes
  • salt
  • sugar
  • chicken
  • peanut oil
I began heating enough water to cover the banana flowers to a boil. I then cut each flower into four pieces and put two pieces of tamarind (each about an inch wide) and the flower pieces into the water. I boiled the flower pieces until they were tender then set them aside. I cut the chicken into bite-sized pieces and diced the onion. I stir-fried the chicken and onion in peanut oil until the chicken was thoroughly cooked. I then cooled the flower pieces and cut them into small pieces. You can see the approximate size in the picture below. (I discarded the tamarind.)


I put the flower pieces in a pan, then added the chicken, onion, diced chili pepper, coconut, coconut milk, small amount of sugar and salt. I then squeezed the lime over the mixture. The picture below shows how it looked.


I heated it thoroughly on medium high heat so the flavors could blend. Then I served it with rice and Naan. The picture below shows a serving.

Wednesday, September 22, 2010

The Autumnal Equinox and the Chinese Moon Festival

Today is the first day of autumn! Here in Austin it still feels like summer, and the trees are still green...however soon the weather will start to cool. Today is also the Autumn Festival in many Asian countries. This is the 15th day of the 8th month of the Chinese Calendar, and also the day when the moon is considered to be the brightest full moon of the year.


I was worried that I would not be able to see the moon tonight, because it was cloudy for much of the day...however the clouds left and I was able to see the full moon in all of its brilliant glory. I took some moon cakes to work today to celebrate the Chinese Autumn or Moon Festival with my co-workers. Here is a picture of some of the moon cakes we shared.


I found some internet resources that might help you understand the traditions of the Moon Festival. They are listed below.

This festival is fun for both children and adults. You should incorporate this family celebration into the rituals of your household if you want to have a fun experience and introduce your children to the full moon and Chinese culture!

Sunday, September 19, 2010

Injera: Iron rich staple of the Ethiopian diet

Injera is the Ethiopian bread made from teff. I was curious, so I had to try it! The teff flour is shown on the left. 


To make injera, I mixed water with teff flour and put it in a plastic container, covered the container with a towel and let the mixture ferment overnight. This step can take up to 3 days, but you can tell when it is ready because it has bubbles and a sour aroma. I heated to medium a skillet lined with a small amount of olive oil. I poured a thin layer of batter into the hot skillet and cooked it for only a few minutes. The result is shown below. 


One side is porous as you can see and the other side is smooth. Stew and other foods are put on top of the injera, and the porous bread absorbs the flavors. Ethiopians break off a piece of the injera to use as an eating utensil. They bend it and scoop up their food and stick it in their mouth! 

To be honest, I didn't really like the taste of the injera because it was slightly sour, perhaps because I did not have a wonderful Ethiopian Wat (stew) to pour on top. I will definitely try it again with the Wat!


Also, I ruined a few pieces before I figured out how to cook it properly...so all was not lost today because I really needed to practice before adding Wat. Don't be discouraged if it takes some time to get the knack of cooking injera!


The procedure for making injera, along with some interesting information about Ethiopian culture and food can be found at
http://www.epicurious.com/recipes/member/views/INJERA-1275373;
http://www.angelfire.com/ak/sellassie/food/injera.html; and
http://www.exploratorium.edu/cooking/bread/recipe-injera.html.

The exploratorium site contains an injera recipe along with scientific explanations for students.

I also made muffins from the teff flour. They turned out really well!! The recipe I used was on the flour package. This muffin recipe and some injera recipes call for a mixture of teff flour and another type of flour. For traditional Ethiopian injera, only teff flour is used. The muffins had teff flour mixed with brown rice flour. 


The muffin recipe can be found at http://www.bobsredmill.com/recipes_detail.php?rid=846


I used almonds instead of hazelnuts because I didn't have any hazelnuts. The muffins are high in iron and have a hearty, slightly sweet taste. They are easy to prepare


Saturday, September 18, 2010

Ancient Grains: Teff


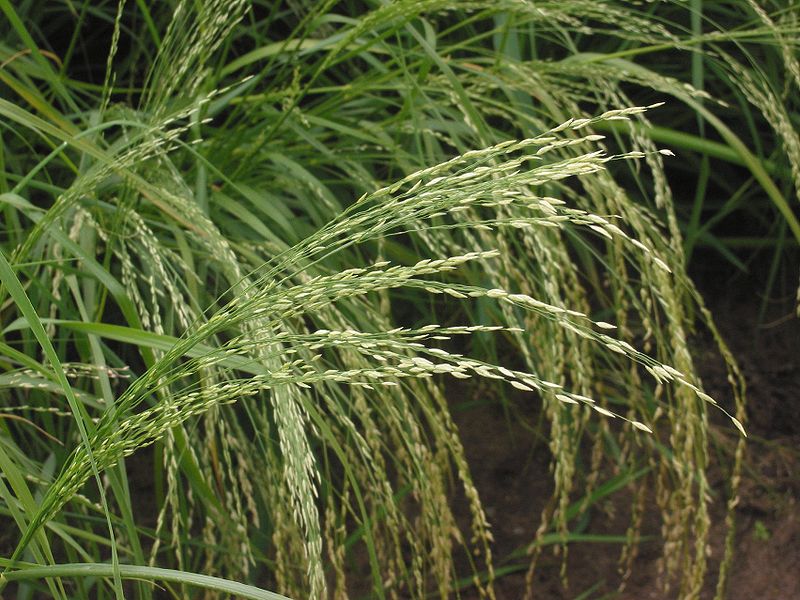
Ethiopians domesticated the grain Teff as early as 4000–1000 BCE. The name Teff means "lost" because this grain is easily lost if dropped because it is the smallest of the  grains.


Although many ancient grains have been nearly lost and rediscovered, teff has been used continuously in Ethiopa to make a bread called injera. This bread is a little thicker than a crepe and is quite spongy. Ethiopians prepare it into large flat sheets, then make "stew like" meals that they place on top of the injera. They then break off pieces of the bread and scoop up the stew with it to eat. I find this incredibly resourceful!


Teff is also known as lovegrass in English and belongs to the genus Eragrostus. Because the grains are so small the bran is difficult to remove, so it is used as a whole grain, making it quite healthy.


Teff is a crop that can survive the stresses of an unreliable climate, so it has the potential to provide nourishment in many marginal environmental areas.


Below are some interesting links that will help you learn more about teff.


http://www.versagrain.com/teff.html
http://www.hort.purdue.edu/newcrop/cropfactsheets/teff.html 
http://ethnomed.org/clinical/nutrition/more-about-ethiopian-food-teff
http://nutritiondata.self.com/facts/cereal-grains-and-pasta/10357/2


http://blip.tv/file/1501065 great video about making teff

Prickly Pears: Adventures with Nopales


For my first culinary experience with nopales I wanted something simple, so I made salsa. My meal was not entirely faithful to Mexican tradition because I served it with salmon and opa, yet it was a perfect combination! Everyone really enjoyed it!


You can see the salsa on the left.


The ingredients are shown on the right. For this recipe you will need:


1 1/2 cup cooked nopales
6 tomatillos diced
1 cup cooked white corn kernels
2 reconstituted dried chipolte peppers slivered
4 teaspoons orange juice
3 teaspoons lime juice
2 teaspoons chopped cilantro
1 teaspoon chopped mint


  • First I grilled the whole nopales paddles for a few minutes per side to make them tender.
  • Then I used a vegetable peeler to "rub" over the surface and remove the eyes. The eyes were attachment spots for thorns. I did not really try to remove all of the skin.
  • Then I diced the nopales.
  • I mixed all of the ingredients in a non-reactive bowl, then placed the bowl in the refrigerator so the flavors could mingle for at least 30 minutes.
While the salsa was "mingling," I worked on the other parts of the meal.  I used a recipe from epicurious at http://www.epicurious.com/recipes/food/views/Grilled-Salmon-with-Lime-Butter-Sauce-1222181 for the salmon. I kept the lime butter sauce separated from the salmon so that people could use the salsa or the sauce as they desired. The lime butter sauce was the perfect accompaniment to the salmon and the opa. 

I had the opa squash, shown on the left, that I needed to use, not thinking of the fact that it is also called Asian squash. I just associated squash with Mexico and Latin America and thought it would go with the salsa. Then I found out that it was mostly used in Asian cuisine. 

This made me think of the wonderful world we live in these days! We can readily find many ingredients and mix aspects of different cuisines from all parts of the globe. I found the opa at the farmer's market, but later also saw them in the grocery store. 

So in this meal I am mixing Salmon, which I associate with the Pacific Northwest of the United States, with a Mexican Nopales Salsa, with a squash that is commonly used in Asian cuisine! This probably could not have been done easily in North America one hundred years ago. I feel so lucky!!!  


The picture on the right shows the inside of the opa. I diced the opa and steamed it. We smothered it with the lime butter sauce, and it was delightful!


The picture to the left shows the opa as it was served in the bowl.

The picture on the right shows the tuna or fruit of the prickly pear. Since we had never eaten it before, I wanted to eat it plain, so I just peeled it and cut the pulp into pieces. You can see the skin below the plate of fruit. The fruit has a lovely mild "watermelon" taste. It also has many seeds woven into the fibrous pulp. We just had to eat the pulp and spit out the seeds.


Prickly pear tunas make great jams and juices, and the seeds can be strained away from the pulp. That might be a better way to eat them.

Wednesday, September 15, 2010

Nopales: Nourishment in the Arid Lands

At first glance, these prickly pears don't look useful as food. But people have been eating them for thousands of years. 


In fact, they are quite nutritious as you can find out at http://nutritiondata.self.com/facts/vegetables-and-vegetable-products/3030/2


The nopales are the flattened paddle-like stems of the cacti. The leaves of these plants are actually modified into spines for protection. You can see the fruit or tunas on top of the nopales.


The nopales contain large amounts of fiber and vitamins and have a very low glycemic index. A food with a low glycemic index causes blood sugar to rise slowly and does not shock pancreas cells to produce insulin abruptly. The tunas have similar nutritional characteristics.

Gloves must be worn when harvesting both the nopales and tunas. The nopales are easy to snap off or cut off with a knife. The tricky part is removing both the large thorns and hairlike bristles. Special gadgets are made for this, but many people use knives or peelers to cut out the thorns.
Of course you can do as I do...buy them in the store with the thorns removed.

These pictures were taken behind my home where prickly pears are common in the brush land. One day I will be ambitious and harvest them, but for now I will buy them in the store without the thorns.


The tunas are full of seeds that are difficult to remove because the fruity flesh adheres to them. Maybe that is why jams and juices are often made from them. The tuna can be smashed and strained preserving much of the  "goodness."  

A friend of mine who grew up in West Texas remembers picking the tunas with his friends as a boy. The boys would peel them and eat the luscious fruit. They would then spit the seeds at each other, kind of like we used to do with watermelon seeds. It was quite a fun game evidently! 


The tunas taste a bit like a mild watermelon to me. They are quite pleasant, and for boys in a small town in West Texas, they must have been delightful!

Prickly pears are in the genus Opuntia, which is quite a diverse group. Some are about 2 inches tall, and others are tree like and can reach 100 feet in height. The ones in central Texas tend to be around 3 to 4 feet tall on average. 

I will describe my adventure in cooking nopales in my next post.


Sunday, September 12, 2010

Savoring the Essence of Spelt in Muffins


I wanted to make something simple to thoroughly savor the tast of spelt, so I used the incredibly simple recipe on the back of the Red Mill Spelt Flour package. I was pleased! The muffins were filling with a rich, wheaty taste. OK, I know that is not profound, but I can't find the appropriate words for the flavor. It is sort of like whole wheat bread that we buy in bakeries, but with a stronger wheaty flavor. Let me know if you can think of a better way to describe it.


Basically, all I needed was (some of this differs from the recipe on the package):
2 1/4 cups spelt flour
1/4 cup of agave syrup (brown sugar or honey will be good substitutes, because the purpose of this ingredient is sweetness)
1 tablespoon of baking powder
small amount of salt
1 1/4 cup milk
3 eggs, beaten
1 tablespoon of oil (I used regular vegetable oil...nothing fancy.)

I preheated the oven to 425 and greased and floured a 12-muffin pan. I mixed the dry ingredients in one bowl. Then I beat together the syrup, milk, eggs, and oil. I then mixed this beaten mixture with the dry ingredients and filled the muffin cups 2/3 full. I baked them for about 17 minutes.

The aroma made everyone hungry as it spread throughout the house. My elderly parents tried them politely, but did not particularly like them...although I enjoyed them for breakfast on my way to work. They could carry me throughout an entire morning with energy to spare. I think these are great to try, but the spelt flour is more expensive than regular whole wheat flour, so I might not make these on a regular basis.

It was great to try though, because it connected me with my ancient ancestors. I have access to a lot more ingredients to mix with the spelt, and my level of effort was not as great in making something edible from this grain. But I do have immense respect for spelt, and ancient grain that changed civilization and provided the first food given freely by the government to people who need it in the Roman Empire.

Wednesday, September 8, 2010

Ancient Grains: Spelt


Eising/Getty Images

Triticum spelta, commonly known as spelt in the United States, Farro in Italy, and Dinkle in Germany is a type of wheat that was domesticated around 5-6000 BCE in what is now Iran. It spread westward throughout Europe and was  distributed to needy Roman citizens throughout the Roman Empire. Prior to 1920, it was the primary wheat source throughout the world. After 1920 it nearly disappeared from stores as wheat varieties too over because they have higher yields and easier processing. The health food movement brought it back to popularity in the 1970s.


Spelt contains about three times as much protein and fiber as white wheat flour. It also contains Mucopolysaccharides that act as a blood clotting factor and immune system stimulator. Spelt is also an excellent source of B complex vitamins. 

Because spelt has a sturdy husk on the kernel, it is resistant to some pollutants and insects. 

Sunday, September 5, 2010

Quinoa with Almonds and Cranberries


I love this recipe! Quinoa can be bland, but mix it with almonds and cranberries, and it is fabulous. The recipe is relatively quick and easy.


The ingredients are:
1 cup quinoa
1/2 cup slivered almonds
1 teaspoon of vegetable oil (I used almond oil)
1 1/2 cups boiling water
1 vegetable cube (or chicken boullion)
1/2 teaspoon salt
1 cinnamon stick
1 bay leaf
1/2 cup dried cranberries


Most quinoa sold in the United States have been pre-washed, but it is advisable to wash it again anyway. Soak the quinoa for 15 minutes. Afterwards, stir and drain the quinoa. 

Heat a wide-bottomed pan on medium heat and add the oil. Add the almonds and stir them until they are golden. Remove and set them aside. 


Next add the quinoa to the pan and stir until dry and turning color. Add the boiling water, cube or boullion, salt, bay leaf, cinnamon stick, and dried cranberries. Bring it to a boil then cover, lower heat and simmer for about 10 minutes, or until all water is absorbed. Let it sit for about 5 minutes. You can serve it immediately or save for later.

Ancient Grains: Quinoa

photo courtesy of net_efekt
Quinoa, like amaranth is not technically a grain because it is not a grass. Quinoa seeds however are ground and uses as grains. Amaranth is grown in warm areas or seasons, whereas quinoa is grown in cold areas or seasons. 

The origin of quinoa is probably the Altiplano region of Peru or Bolivia about 3000 years BCE. The ancient Incas called it la chisiya mama which means the mother grain. The first sowing of the season was a ceremony in which the Inca Emperor planted the first seeds with a gold shovel. The Incas mixed quinoa with animal fat and made balls that they called "war balls." The men would take them on marches as nutritious food. This seems reminiscent of the use of pemmican by the Commanches.

The Spanish conquerors did not like quinoa, possibly because the seed coat contains saponins, which are bitter. Saponins are easily removed by rinsing the grains, but the bitterness mixed with quinoa's sacredness to the Incas caused the Spanish to discourage its production. Instead, they encouraged corn production and quinoa became much less common. 

Quinoa color varies from off-white to red to black and it contains all nine essential amino acids. Also, quinoa is a good source of manganese, magnesium, iron, copper, and phosphorus, and a moderate source of zinc, potassium, B vitamins, and vitamin E. Quinoa is easy to digest and a good source of fiber. 

People often snack and overeat because when they eat certain foods their blood sugar level abruptly spikes and declines making them hungry again quickly. Quinoa has a low glycemic index therefore the uptake of sugars is regulated and slower, therefore the eater has a ‘full’ feeling longer. So quinoa can help you avoid between-meal-snacks. Also, quinoa is healthy for our hearts and has only about 159 calories per serving.
  

Amaranth Greens: Mesoamerican Spinach

I was lucky to find amaranth greens at the local farmers market. They are similar to spinach, but have a lighter taste.Amaranth greens, are a great source of vitamins A, B6, C, riboflavin, folate, calcium, iron and magnesium. 1 cup of cooked amaranth leaves contain just 28 calories and 0.2 grams of fat. About 3 cups cook down into about 1 cup. 


For the recipe I used and a picture of the results go to
http://blog.kitchentherapy.us/2009/07/asian-amaranth-greens/

Friday, September 3, 2010

Amaranth Carrot Cookies: Energy for a Marathon


So with my grain of the Aztec Gods I had to make something special. I love cookies so I tried the recipe on the package of amaranth flour. 


I used the following ingredients:
6 tablespoons vegetable oil
1/2 cup agave syrup
6 tablespoons water
2 cups amaranth flour
2/3 cup corn or arrowroot starch
1 teaspoon baking soda
1/2 teaspoon sea salt
1 teaspoon cinnamon
2 teaspoons vanilla
2/3 cup grated carrots
2/3 cup raisins


I preheated the oven to 350 and lightly greased a cookie sheet. I then combined all of the wet ingredients and set them aside. In another bowl I mixed the dry ingredients. The recipe calls for sifting, but I didn't do that. It would probably make the cookies better, but I thought they were good without sifting.  I then added the wet and dry ingredients and mixed them well. Then I added the carrots and raisins. This recipe makes about 1 dozen cookies, so I divided the dough into 12 balls. I flattened the balls and placed them on the cookie sheet. I baked the cookies for about 12 to 15 minutes. They should be lightly brown when finished. I cooled them on a wire rack when they were done.


The cookies are quite filling and provide the body with a lot of energy. They have a touch of sweetness from the agave syrup and make a great healthy snack. And of course they have the grain of the Gods!

Ancient Grains:Amaranth

Amaranth, relative to the familiar garden flower cockscomb, cultivated in Mexico for about 4000 years, was considered sacred to the Aztecs. They mixed it with honey or sacrificial blood to form a paste that was molded into statues of Gods. The statues were used in ceremonies then divided and eaten by the people. 


Amaranth is technically not a grain like wheat, corn, and barley which are in the grass family.  It is a broad-leafed plant, and the seeds are used like grains.

Because the Aztecs revered amaranth and the Spanish conquerors considered these rituals barbaric, amaranth was forbidden and slowly disappeared into obscurity. Before the Spanish had arrived, amaranth had spread to the Inca Empire. People in remote mountain villages in Mexico and the Andes continued to grow amaranth.

Also, amaranth is quite hardy and grows wild in Mexico. It was rediscovered by the health food movement and became popular in health food stores in the 1970s. 

Amaranth is stuffed full of nutrition! It is gluten free and low in fat and high in fiber, protein, calcium, iron, magnesium, manganese, vitamin E, vitamin B6, riboflavin, niacin, pantothenic acid, folate, potassium, zinc, copper, selenium and phosphorus.  It has a low glycemic load, which means that it does not raise blood sugar significantly, making it a good food for people living with diabetes. The cholesterol lowering characteristics of amaranth also make it healthy. 

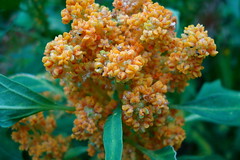
The picture on the left is amaranth. It can be cooked as a cereal, ground into flour, sprouted, popped like popcorn, or toasted. The seeds can be cooked with other whole grains, added to stir-fry, soups and stews as a nutrient rich thickening agent. The leaves of amaranth have a taste similar to that of spinach and can be boiled or stir-fried. 


Because amaranth plants withstand harsh conditions and sprout easily, they have spread around the world. In both Mexico and Peru the amaranth leaves are still gathered to use as a vegetable. 


In India amaranth is known as the King's grain, rajeera, and is popped then used in confections called laddoos. These are similar to a Mexican confection called alegria. In Nepal, amaranth seeds are eaten in a gruel called sattoo or ground into flour to make chappatis. In Ecuador, the flowers are boiled then the colored boiling water is added to rum to create a drink that purifies the blood.

Blue Cornbread

In honor of the Hopi People and the Blue Corn Maiden, I made cornbread from blue corn flour. You can see a piece of it above. It tasted great and was quite quick and easy.
hopi_corn_sm.jpg (19603 bytes)
                        Hopi cornfield at the village of Moencopi - 1941. 
              Photo NAU.PH.96.4.14.10 by Bill Belknap 
                                                    courtesy of Cline Library Special Collections, Northern Arizona University.


The Hopi  are sometimes considered the world’s greatest dry-farmers. They live in the high desert region of Arizona and have developed farming practices that allow them to grow corn by carefully using water. 

The Hopi consider themselves to be in their fourth way of life. As they moved from the third to the fourth way of life, Ma'saw offered them corn. The other peoples took the largest ears of corn and the Hopi were left with the short blue ear. 

Different Hopi clans have different versions of how this happened, but because they ended up with the short blue ear, the Hopi knew that their fourth way of life would be difficult and centered around corn. In this way, the Hopi believe that they have always had corn and agriculture. 

The recipe I used to make blue cornbread was incredibly easy! The image above on the left shows the blue corn flour I used. 

For this recipe, you will need
1 cup blue cornmeal 
1/2 cup all-purpose flour or any flour 
1 1/2 teaspoon baking powder 
1/4 teaspoon salt (optional) 
1 tablespoon honey 
1 egg beaten 
1 cup milk

I mixed the liquid ingredients in one bowl and the dry ingredients in another bowl. I actually used agave syrup instead of honey, and it substituted well. I then mixed all of the ingredients together and poured the batter in an 8 inch square pan. You can use a muffin pan for 6 large muffins instead  of using the square pan.  I baked it at 425 degrees for 15-20 minutes, until it was golden brown. It is best served warm.